


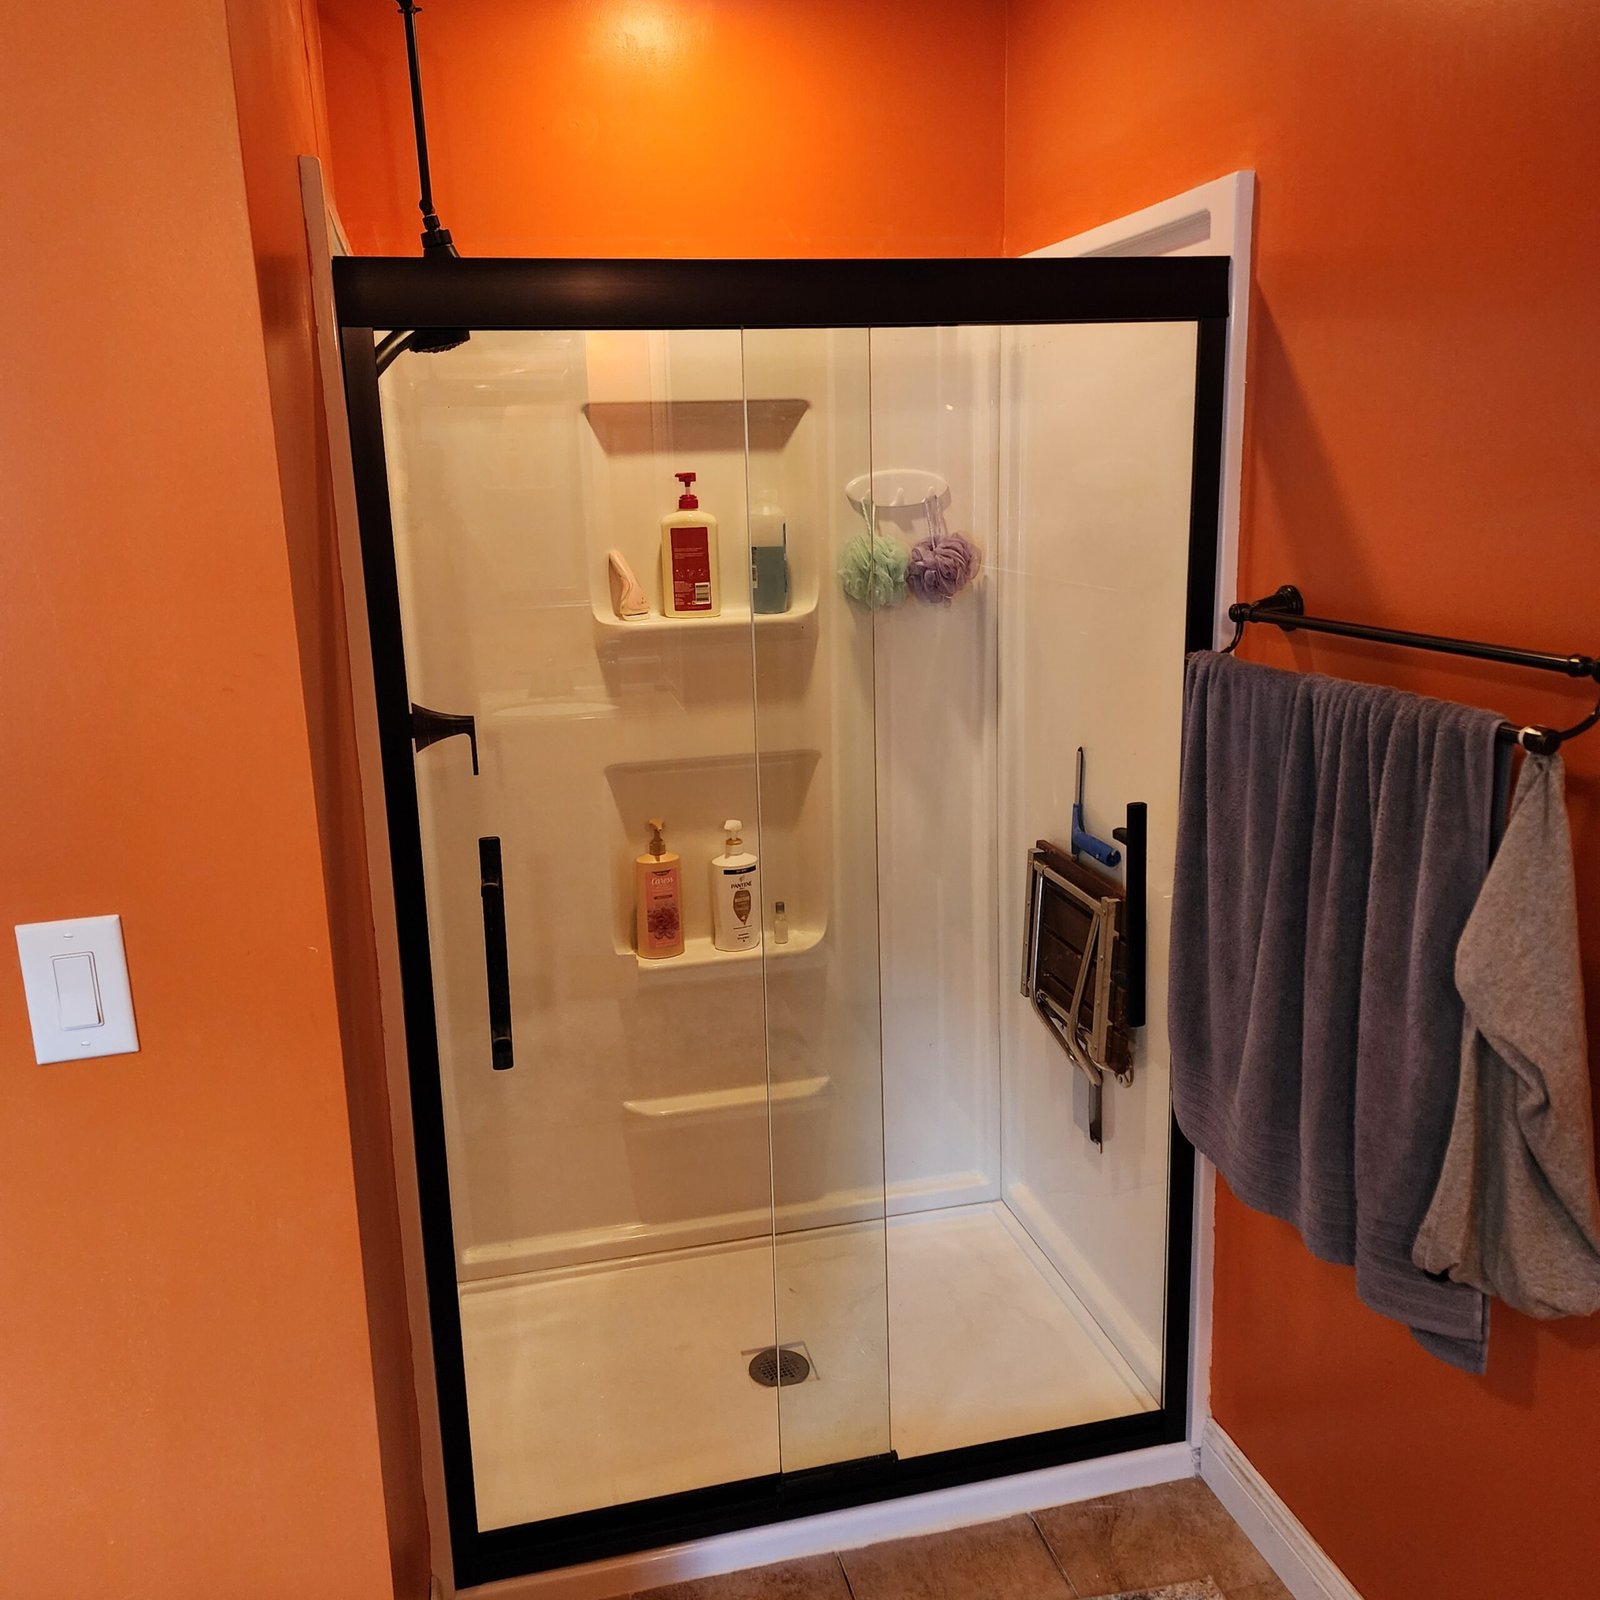
Choose a shower door by fitting the door to the finished opening, not by choosing a glass style first. Confirm the opening configuration, width range, wall and threshold conditions, operating path, water direction, and mounting surfaces. Then compare framed, semi-frameless, or frameless products that are designed for those conditions.
EazyStep Bath uses this fit-first process for shower door installation requests across its Lexington, Jackson, and West Tennessee service area. The selected door must match the finished opening, mounting surfaces, hardware path, and nearby fixtures.
1. Define the existing opening before shopping
First identify what the door must enclose. Is it a straight shower opening, a tub opening, a corner with a return panel, or an opening that needs a door plus a fixed panel? Note whether finished tile, an acrylic surround, a fiberglass unit, or another surface forms each side. Photograph the full opening, both wall returns, the threshold, the showerhead, controls, toilet, vanity, and nearby doorways.
Measure only after the wall and threshold finishes are complete. Basco’s manufacturer measuring guidance tells buyers to finalize wall material first and to measure an inline opening at the bottom, center, and top. Those readings reveal whether one part of the opening is narrower than another. Height matters too, but a width and height are not a product approval by themselves.
Do not round the opening to a familiar nominal size and order from that label. Compare the actual finished measurements with the exact model’s stated fit or adjustment range. Keep the smallest and largest width readings, the proposed door height, and the model number together so the selection can be checked as one package.
2. Check walls, threshold, plumb, level, and mounting area
A door can match the width and still be wrong for the opening. Check whether the walls are plumb, whether the threshold is level, how much flat surface is available for tracks or hardware, and what material lies at each mounting point. Curves, raised lips, decorative trim, seams, and sloped ledges can reduce the usable mounting area.
Manufacturer requirements vary by model. One current Kohler sliding-door installation manual, for example, specifies its own minimum flat surface, allowable out-of-plumb condition, and level-base requirement. Those numbers belong to that product, not to every shower door. The practical rule is broader: read the specification sheet and installation instructions for the exact model, then compare every requirement with the actual opening.
Mounting conditions also change the decision. Basco notes that wall material can influence installation and that proper material or blocking behind the wall is important for heavy glass and frameless configurations. An installer must reconcile the visible finish, concealed support, fasteners, and manufacturer instructions. Glass style alone does not answer that question.
Have the opening checked before you commit to a door
EazyStep Bath evaluates the finished opening, measurements, walls, threshold, nearby fixtures, and the selected door’s requirements before shower door installation.
3. Choose an operating pattern that fits the room
Next decide how people need to enter and exit. A sliding or bypass configuration keeps the moving panels within the plane of the enclosure, which can avoid a swing arc in the room. A pivot or hinged door creates a moving arc that must be mapped against the toilet, vanity, towel bars, walls, and the path used to approach the shower. A fixed panel leaves an open entry, but water containment and available opening width still need review.
Do not choose from the category name alone. Compare the actual walk-through opening, handle position, panel overlap, bottom track or guide, and the force and hand movement needed to operate the selected model. Think through entry and exit with the bathroom door open and closed. If another person assists with bathing, include that person’s standing space and access path.
A shower door is an enclosure component. It is not a grab bar or support device. If a purposeful handhold is needed, plan it separately and coordinate it with the glass and hardware. The grab bar placement planning guide explains why the movement and mounting path should be reviewed together.
4. Map water direction and every possible collision
Mark the showerhead location, spray direction, controls, shelves, benches, and curb slope before choosing panel orientation. Basco’s door-selection guidance treats showerhead position as a factor in sliding-panel and swing-door layout. The Kohler model instructions cited above also specify which side receives its fixed panel. Follow the selected manufacturer’s configuration rather than applying one layout to every door.
Now trace the moving parts. Open a proposed swing with tape on the floor or a measured sketch. Check handles against walls and fixtures. Check the top and bottom paths, not just the middle. Confirm that the door will not block control access or force the user into an awkward approach. A layout that clears the toilet by a fraction may still be unpleasant to use every day.
Water containment depends on the complete assembly, including panel orientation, overlap, seals, sweeps, threshold, wall condition, and installation. No enclosure should be selected on the promise that glass alone will stop all water. Follow the product instructions for placement, sealing, use, inspection, and maintenance.
5. Choose frame style, glass, and finish after fit
Once the opening and operation eliminate incompatible choices, compare the visual options. Framed doors use more perimeter framing. Semi-frameless products reduce framing in selected areas. Frameless products rely on thicker-looking glass edges and more exposed hardware, but the label does not tell you whether the wall, threshold, or support conditions are suitable.
Choose clear, patterned, or privacy glass based on light, visibility, cleaning preference, and the product options available for the compatible model. Choose hardware finish after the operating and mounting requirements are settled. A finish can coordinate with faucets and other hardware, but appearance should not override fit or manufacturer requirements.
Use glazing supplied and identified for the shower-door system. Do not cut, drill, grind, or modify tempered door glass in the field. The Kohler instructions warn that tempered glass can shatter if it contacts hard surfaces and call for regular inspection of glass and parts. Follow the exact product’s handling and maintenance instructions.
6. Final shower door selection checklist
Opening
Record: finished configuration, bottom, center, and top widths, height, returns, and the narrowest point.
Surfaces
Check: plumb, level, flat mounting area, wall finish, threshold shape, concealed support, and drill locations.
Operation
Map: walk-through width, sliding overlap, swing arc, handles, controls, nearby fixtures, and approach path.
Exact product
Verify: model number, fit range, handing, panel orientation, hardware, installation instructions, and maintenance.
Stop before ordering if the measurements are inconsistent, the walls or threshold fall outside the product requirements, the mounting path is unknown, or the operating path creates a collision. A field evaluation is less expensive than forcing an incompatible door into the opening. For a wider look at movement through the room, use the bathroom mobility checklist. The bathtub step-over options guide also explains why an enclosure must be coordinated with any planned tub-access change.
Shower door selection questions
Should I choose framed or frameless glass first?
No. First confirm the finished opening, wall and threshold conditions, mounting requirements, and operating path. Then compare frame styles among products that are compatible with those conditions.
Is one width measurement enough for a shower door?
No. Measure a finished inline opening at the bottom, center, and top, and record the height and configuration. Compare all readings with the exact model’s specification and installation instructions.
When is a sliding shower door useful?
A sliding door can avoid a swing arc in the bathroom, but it still needs a compatible opening, sufficient mounting surfaces, correct panel orientation, usable walk-through space, and a layout that manages water appropriately.
Can a shower door be used as a handhold?
No. A shower door is an enclosure component, not a support device. Plan any needed grab bar separately and coordinate its useful location and mounting path with the glass and hardware.
Fit the door to the opening
Ask Mike to evaluate your shower door opening
EazyStep Bath provides focused shower door installation in Lexington and Henderson County, Jackson and Madison County, and nearby West Tennessee communities. Final suitability depends on the finished opening, selected product, mounting surfaces, hardware, access, and site conditions.
Request shower door installation Call EazyStep Bath Send opening details
Sources and scope
- Basco Shower Doors: How to Measure
- Basco Shower Doors: Before You Buy a Shower Door
- Kohler: Sliding Shower Door Installation Instructions, model-specific guidance
This shower door selection guide is educational. It is not a product approval, engineering evaluation, code-compliance determination, or promise that an enclosure will prevent a fall, injury, leak, or water escape. The selected manufacturer’s instructions and actual site conditions control the final installation.